Installation & Setup
Get Magical Shop Builder up and running on your WordPress site in minutes.
System Requirements
Before installing Magical Shop Builder, ensure your server meets the following minimum requirements:
- WordPress 6.0 or higher
- PHP 7.4 or higher (8.0+ recommended)
- WooCommerce 8.0 or higher
- Elementor 3.15 or higher (free version works!)
- MySQL 5.6 or higher (MariaDB 10.0+)
Elementor Pro is NOT required. Magical Shop Builder includes its own template system that works with the free version of Elementor. However, if you have Elementor Pro, it can integrate with Theme Builder as well.
Installation
Download the Plugin
Download the magical-products-display.zip file from WordPress.org or your purchase receipt.
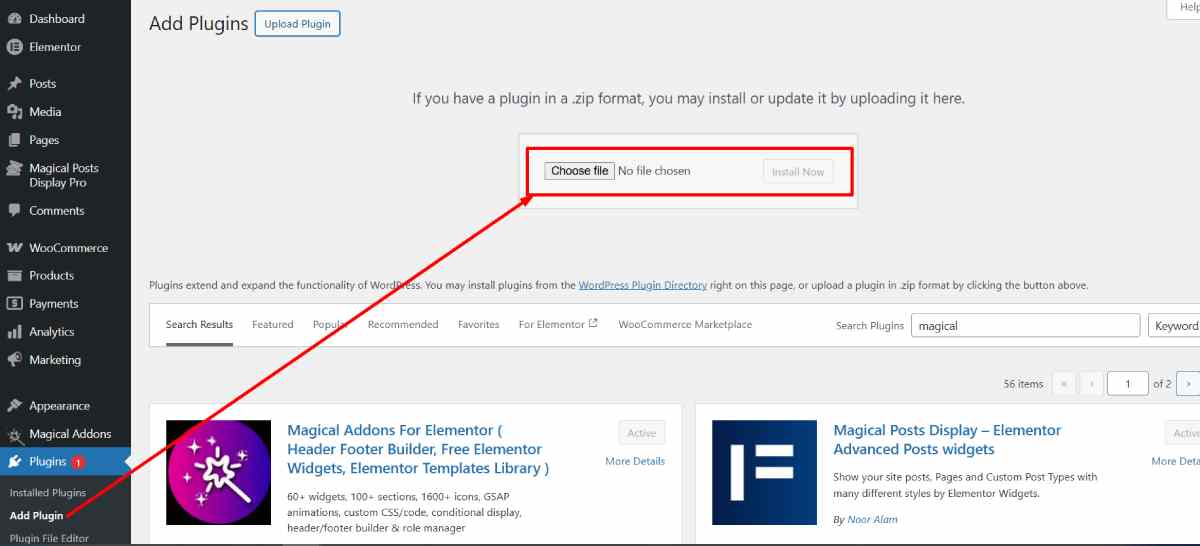
Upload via WordPress Admin
Go to Plugins → Add New → Upload Plugin. Click "Choose File" and select the downloaded ZIP file, then click "Install Now".
Activate the Plugin
After installation, click "Activate". You'll see a new "Magical Shop Builder" menu in your WordPress admin sidebar.
Extract the ZIP File
Extract the downloaded ZIP file on your computer. You'll get a folder named magical-products-display.
Upload via FTP
Connect to your server using FTP and upload the extracted folder to /wp-content/plugins/.
Activate in WordPress
Go to Plugins in your WordPress admin, find "Magical Shop Builder", and click "Activate".
If you have WP-CLI installed, you can install directly from WordPress.org:
wp plugin install magical-products-display --activateFirst-Time Setup
After activation, follow these steps to get your store builder running:
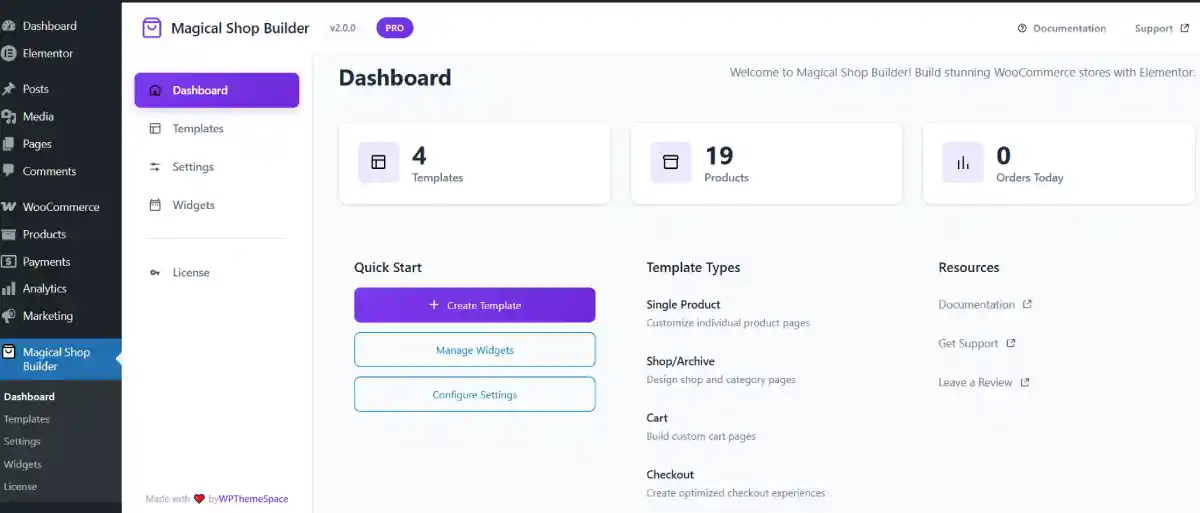
Check the Dashboard
Navigate to Magical Shop Builder → Dashboard. The dashboard shows your store stats including product count, today's orders, and revenue.
Configure Settings
Go to Settings tab. Enable the features you want to use:
- Custom Single Product Template – to design product detail pages
- Custom Archive Template – for shop and category pages
- Custom Cart Template – to redesign the cart page
- Custom Checkout Template – for checkout customization
- Custom My Account Template – to brand the account area
Manage Widgets
Go to the Widgets tab. Here you can enable or disable individual widgets. Disabling unused widgets improves performance by not loading unnecessary assets.
Create Your First Template
Head to the Templates tab and click "Add New Template". Choose a template type and optionally pick a pre-built layout to get started quickly.
Verifying Installation
To confirm everything is working correctly:
- Check Admin Menu – You should see "Magical Shop Builder" in your WordPress admin sidebar with sub-pages for Dashboard, Templates, Settings, and Widgets.
- Check Elementor Panel – Open any page with Elementor. In the widget panel, you should see new categories like "Magical Shop Builder", "Magical Single Product", etc.
- Check Dashboard Stats – The dashboard should display your WooCommerce product count and order statistics.
Missing Widgets? If you don't see the Magical Shop Builder widget categories in Elementor, make sure both WooCommerce and Elementor are active. Then deactivate and reactivate Magical Shop Builder.
Updating the Plugin
Magical Shop Builder can be updated through the standard WordPress update mechanism:
- Go to Dashboard → Updates when a new version is available
- Click "Update Now" next to Magical Shop Builder
- Your templates and settings are preserved during updates
Backup First! While updates are safe, it's always a good practice to back up your site before updating any plugin, especially major version updates.
Installing Magical Shop Builder Pro
If you have a Pro license:
Install the Free Version First
The Pro add-on requires the free version to be installed and active.
Upload the Pro Add-on
Install the magical-shop-builder-pro.zip from your purchase receipt via Plugins → Add New → Upload Plugin.
Activate & Enter License Key
Activate the Pro plugin. Then go to Magical Shop Builder → Dashboard and enter your license key in the license section to unlock all Pro features.